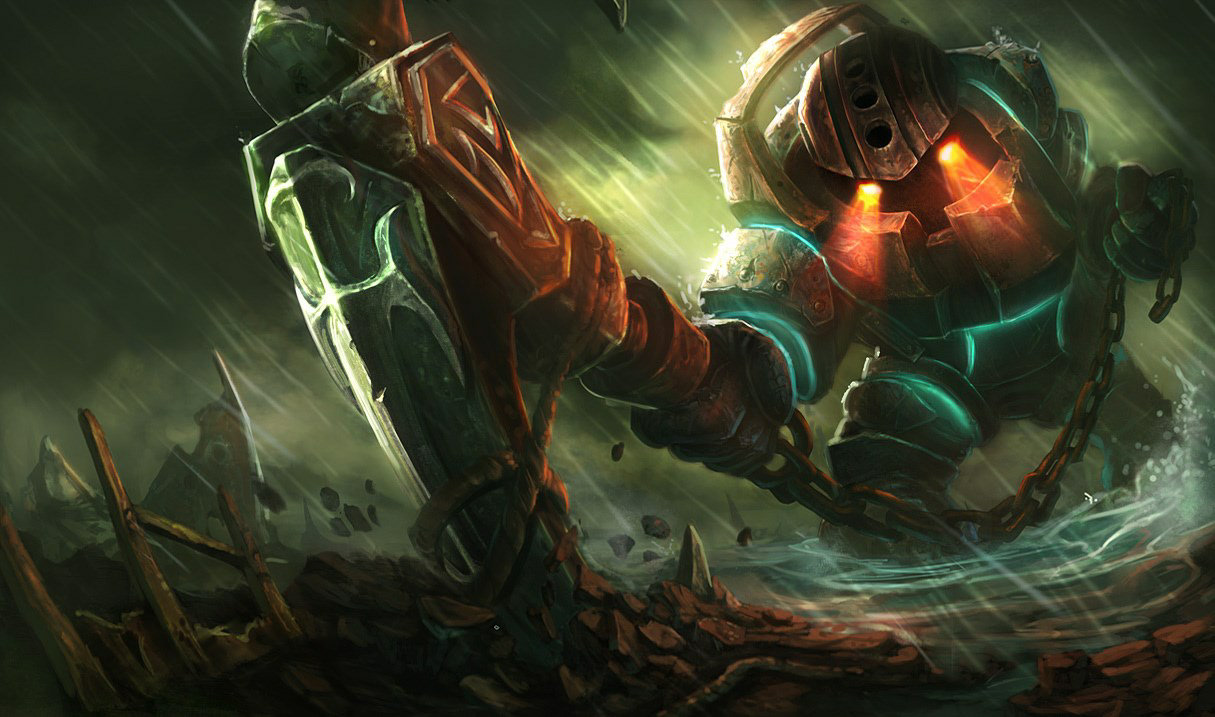
Nautilus is the simplest and most reliable engage support. Q a target, auto for passive root, W, E — the target is dead before your ADC gets there. Your job is to hook the most valuable target, not the nearest target. Skill requires patience and positioning, not mechanical execution.
Abilities
Skills Overview
P

Staggering Blow
Passive
Nautilus' first Attack against a target deals increased physical damage and roots them briefly.
Staggering Blow roots enemies on your first auto attack after using an ability. Always auto-attack after Q pull, W, and E to proc the root. The root duration scales with level.
Q

Dredge Line
Skillshot · Hook · Pull
Nautilus hurls his anchor forward. Colliding with an enemy pulls them and Nautilus together, dealing magic damage. Colliding with terrain pulls Nautilus towards it.
CD: 14/13/12/11/10 · Cost: 60
Q range is 1100 units — longer than most hooks. Throw it through brush when you have vision to surprise enemies. Aim at feet, not center mass, for moving targets.
W

Titan's Wrath
AoE · Slow · Knock-up
Nautilus gains a temporary Shield. While it persists, his Attacks deal damage over time to his target and surrounding enemies.
CD: 12 · Cost: 60
W creates a damage zone under Nautilus and knocks up enemies in the area. Use it immediately after Q lands — the knocked-up enemy can't dodge the W pop.
E

Riptide
AoE · Slow · Shield Shred
Nautilus creates three exploding waves around himself. Each explosion damages and slows enemies.
CD: 7/6.5/6/5.5/5 · Cost: 50/60/70/80/90
E shreds shields before dealing damage — specifically counters Lulu, Seraphine, and Janna who shield their ADC. Drop it on the enemy ADC during a trade to negate their protection.
R

Depth Charge
Targeted · Sequential Knockup · Gap Close
Nautilus fires a shockwave into the earth that chases an opponent. This shockwave rips up the earth above it, knocking enemies into the air. When it reaches the opponent, the shockwave erupts, knocking his target into the air and stunning them.
CD: 120/100/80 · Cost: 100
R knocks up the primary target and then bounces to every nearby enemy sequentially. Use it as follow-up after landing Q — the bouncing knockup clears the entire enemy team.
Skill Leveling Order — Max W first, then E, then Q · R at 6 / 11 / 16
| Level | Q | W | E | R | Note |
|---|---|---|---|---|---|
| 1 | Take Q — hook online immediately | ||||
| 2 | Take W — AoE damage and slow | ||||
| 3 | Level W — main damage source | ||||
| 4 | Take E — shield shred and slow | ||||
| 5 | Level W | ||||
| 6 | R — Depth Charge unlocked | ||||
| 7 | Level W | ||||
| 8 | Level E | ||||
| 9 | W maxed | ||||
| 10 | Level E | ||||
| 11 | R rank 2 | ||||
| 12 | Level E | ||||
| 13 | E maxed | ||||
| 14 | Level Q | ||||
| 15 | Level Q | ||||
| 16 | R rank 3 | ||||
| 17 | Level Q | ||||
| 18 | Q maxed |
Itemization
Recommended Builds
Summoner Spells
Primary
Flash
Best repositioning tool — engage, escape and combo extension
Secondary
Ignite
Kill pressure and Grievous Wounds to deny enemy healing
Situational
 Exhaust
Starter Items

Relic Shield
Nautilus auto attacks and has melee range — Relic Shield is free gold for walking up and executing minions.
400g

Health Potion
Sustain for aggressive early all-ins.
50g
Core Build

Locket of the Iron Solari
AoE shield protects your whole team when you engage. Combine with your Q pull for an instant shield on everyone.
2500g

Plated Steelcaps
Reduce physical damage from the ADC and top laner you'll be diving constantly.
1100g

Redemption
Long-duration engages give time for Redemption to heal your allies mid-fight.
2300g

Randuin's Omen
Crit reduction and AoE slow — enemies can't run from your chain CC when Randuin slows them.
2700g
Situational

Thornmail
Grievous wounds and armor for healing-heavy comps. Your passive roots mean enemies stay in Thornmail range.
2700g

Force of Nature
Essential MR vs AP-heavy teams. Movement speed helps reposition after engage.
2800g

Abyssal Mask
MR shred for your AP carries. Tank with high AP in your team — your presence reduces enemy MR.
2700g
Nautilus is a pure tank. Locket first for engage safety, then build resistances vs the biggest threat. Your CC doesn't care about damage — it locks enemies down and your team deletes them.
AP Tank Hybrid

Sunfire Cape
Burn damage while W zones enemies. Your W and passive deal magic damage — Sunfire on top is devastating.
2700g

Sorcerer's Shoes
Magic pen to make W and passive damage meaningful rather than negligible.
1100g

Rylai's Crystal Scepter
W, E, and passive all slow — Rylai makes hooked targets permanently slowed through your combo.
2600g
Abyssal Mask
MR shred and damage when standing near enemies for extended periods.
2700g
AP Nautilus trades team utility for personal kill threat. Use when ahead and you want to one-shot the enemy carry rather than tank their damage.
Runes
Resolve Primary

Aftershock
Triggered by Q hook. Gives massive resistances during your engage burst window and deals AoE damage — free tanking through the initial CC exchange.

Font of Life
Every Q hook, passive root, W, E, and R marks enemies. Allies heal constantly attacking your hooked targets.

Bone Plating
Reduces burst damage on engage trades. Nautilus takes counter-damage when hooking into enemy range.

Unflinching
Tenacity when low HP so you can complete CC chains even after taking heavy counter-engage damage.
Precision Secondary

Triumph
Heal on takedowns during extended fights. Keeps you alive through long CC chains.

Legend: Tenacity
Reduces enemy CC on you so you can complete your engage combo before getting locked down.
Shards
Ability Haste · Armor · Health
Gameplay
How to Play Nautilus
01
Early Game
Hook the ADC, Not the Support
- Level 1 Q is live — hook the enemy ADC at level 1 for a free kill attempt with your jungler watching.
- Always hook the ADC, not the support. Even a missed hook on the ADC forces them back. Hooking the support wastes your kit.
- After Q pull, immediately auto attack for passive root, then W. This three-ability chain is instant CC that lasts 4+ seconds.
- Walk into bushes to shorten Q angles. Enemies can't see you approaching and hooks from brushes are harder to react to.
- E shreds shields — if Lulu or Seraphine shields their ADC, drop E on them first to remove the shield before your Q follow-up.
02
Mid Game
Roam and Engage Globally with R
- R has global effective range on a rooting target — use it on fed mid-lane carries during roams to pin them for your jungler.
- Every major objective fight (dragon, Baron) — hook the enemy carry immediately. They die in 6 seconds of CC.
- Flash forward then Q for surprise hook angles that enemies cannot react to at all. Always Flash toward, not away.
- Your E shield-shred is extremely valuable. Identify which enemy uses shields and always E them before committing.
- Ward enemy vision zones — a hooked enemy that calls MIA immediately loses their team the fight.
03
Late Game
Hook Carries in Teamfights
- In late teamfights, your job is singular: hook the enemy carry and don't miss. Every other decision is secondary.
- R on a grouped enemy team chains knockups across their entire roster. Throw it into the thickest group after your Q hook lands.
- Save Flash for hook combinations, not escape. A flanking Flash + Q kills the enemy carry. Escaping only delays your team's loss.
- Locket shield your entire team right as their engage ability lands — the split-second shield prevents one-shots.
- Unkillable in late game with full tank items. Walk straight at the enemy team to bait abilities and let your team follow.
Teamfighting
How to Teamfight as Nautilus
Nautilus teamfights are the simplest execution in the game. Hook a carry. Auto for root. W and E in the middle of their team. R to chain knockups across their backline. Your entire job is performed in 5 seconds with correct hook targeting.
1
Pre-Fight — Find the Hook Angle
Before engage
01
Position in brush or behind terrain to shorten your hook range advantage.
02
Identify the carry. Your Q must land on the ADC or mid-laner — not the tank.
03
Pre-activate Locket to shield your team right as you commit to the hook dive.
NEVER hook a tank. If you hook Malphite, you waste your entire engage rotation on an unkillable target. Patience — wait for the carry to be in range, even if it takes 30 extra seconds.
2
Engage — Hook, Root, W, R
Main engagement
01
Q lands → immediate auto attack for passive root. Zero delay between hook and auto.
02
W immediately — the rooted target can't dodge the W pop-up.
03
E on grouped enemies to shred shields and apply slow to multiple targets.
04
R on a secondary target or into the enemy cluster — the knockup chain bounces to every nearby enemy.
3
Aftermath — Tank and Peel
Mid-fight
01
Auto attack every new target you approach after the initial combo — passive root keeps applying.
02
Walk in front of your ADC if they're being chased — your auto roots the chaser.
03
Never retreat unless dying. You're a tank — surviving is secondary to locking down one more target.
Nautilus R can target someone who is already CC'd by your Q. Use R on a second target in the backline — the chain knockup bounces between both the primary and everyone near them for massive team-wide CC.
Video Guide
Watch the Full Guide

Credits to ShoDesu
Tips & Tricks
Advanced Mechanics & Hidden Tech
Advanced mechanics for Nautilus.
Basic
Auto After Every Ability
Your passive Staggering Blow roots enemies after every ability cast. Always auto-attack immediately after Q, W, E, and R. Missing the auto wastes the passive root — it's free CC you're leaving on the table.
Basic
Hook Targeting Priority
Hook priority: ADC > mid-laner > jungler > support > top laner. The carry dies to your CC chain. A hooked support is annoying but rarely decisive. Patience wins games — wait for carry positioning.
Intermediate
Bush Hooks
Throw Q from inside brush without revealing yourself first. The shortened distance and surprise means enemies rarely dodge. Walk behind brush entrances just before the enemy ADC walks forward for CS — they won't see the hook coming.
Intermediate
E Shield Shred Timing
E shreds ALL shield types including Lulu W, Janna E, Lux W, and Morgana E. Cast E on the shielded target BEFORE your Q hook lands so the shield is already removed when your CC chain starts. One second earlier makes the CC chain lethal.
Advanced
R Chain Maximization
R bounces to nearby enemies sequentially. For maximum knockups, throw R into the thickest cluster of enemies after your initial Q. R on a single isolated target wastes most of its value — aim for groups of 3+ for maximum AoE CC.
Basic
Relic Shield Stacking
Walk up and execute minions with Relic Shield for bonus gold. At melee range, Nautilus can proc Relic easily. Coordinate with your ADC — last-hit near-dead minions as Nautilus so they get the bonus gold and you stack Relic.
Advanced
Flash Hook Surprise
Flash forward, then immediately Q in the same direction. The Flash closes the gap before your Q travels — the enemy is hooked with zero warning time. This combination has almost no counter-reaction window.
Matchups
Counters & Matchups
Nautilus struggles against mobile champions who can dodge his hook and safe backline ADCs. He excels against any champion that needs to walk forward to deal damage.
Click any matchup to expand tips & how to play against them
Loses Against

Ezreal's E blinks away from every Q attempt. He can poke from outside your hook range while his ADC farms safely. Your kit is completely neutralized by one E button.
Flash + Q for surprise angles that Ezreal can't blink away from in time. Or crowd him into a position against a wall where his E blink has nowhere safe to go.

Lucian's dash is on a very short cooldown and sidesteps Q easily. He plays aggressively inside your Q range where you can't aim effectively.
Bait out Lucian's E dash on a minion or poke, then immediately Q while he's on cooldown. His dash is his only escape — when it's down, Q immediately.

Janna's Howling Gale and Monsoon completely negate your engage. She knocks up your entire dive before it reaches and pushes you away with R during your combo.
Bait out Janna's Q tornado before committing to Q engage. If her tornado is on cooldown, she has no hard disengage for your pull.
Wins Against

Soraka has no engage and can't escape your hook. Your passive root interrupts her Wish channeling and your CC chain ensures she can't heal fast enough to survive.
Always prioritize hooking Soraka herself when possible — removing her heal is worth more than hooking the ADC. She dies instantly and her R heal gets canceled.

Sona has almost no mobility and your hook range exceeds her safe poke range. One hook kills her instantly in lane. She can't safely walk up for Power Chord without being hooked.
Hook Sona whenever she approaches the wave — she has almost no HP and dies immediately after your Q root chain. Force her to play from extreme range where she's useless.

Seraphine is immobile and your E specifically removes her passive shields. Her slow movement speed means your Q always hits her if she's anywhere near the wave.
E before Q to remove Seraphine's shield, then Q root her for the kill. Her shield is her only defense and E pre-removes it perfectly.
Team Comp
Best Synergies

Nautilus hooks a target and R launches them airborne for Miss Fortune to land Love Tap Q and Bullet Time on a stationary enemy. The hook-into-R sequential CC means Miss Fortune has a guaranteed long damage window.

Nautilus hooks a target and Draven lands two Spinning Axe autos on the CC-locked enemy for a massive burst of early damage. Draven's Adoration passive gold stacks from every kill Nautilus's CC enables.

Nautilus hooks and R-stuns the entire enemy team in sequence, giving Katarina free time to channel Death Lotus without interruption. The sequential lockdown from Q hook through R knockup covers Katarina's entire R duration.

Nautilus R launches targets airborne with sequential knockups, creating the kill conditions for Jinx to trigger Excited and chain into resets. Jinx's AoE damage benefits from the clustered CC Nautilus creates at close range.