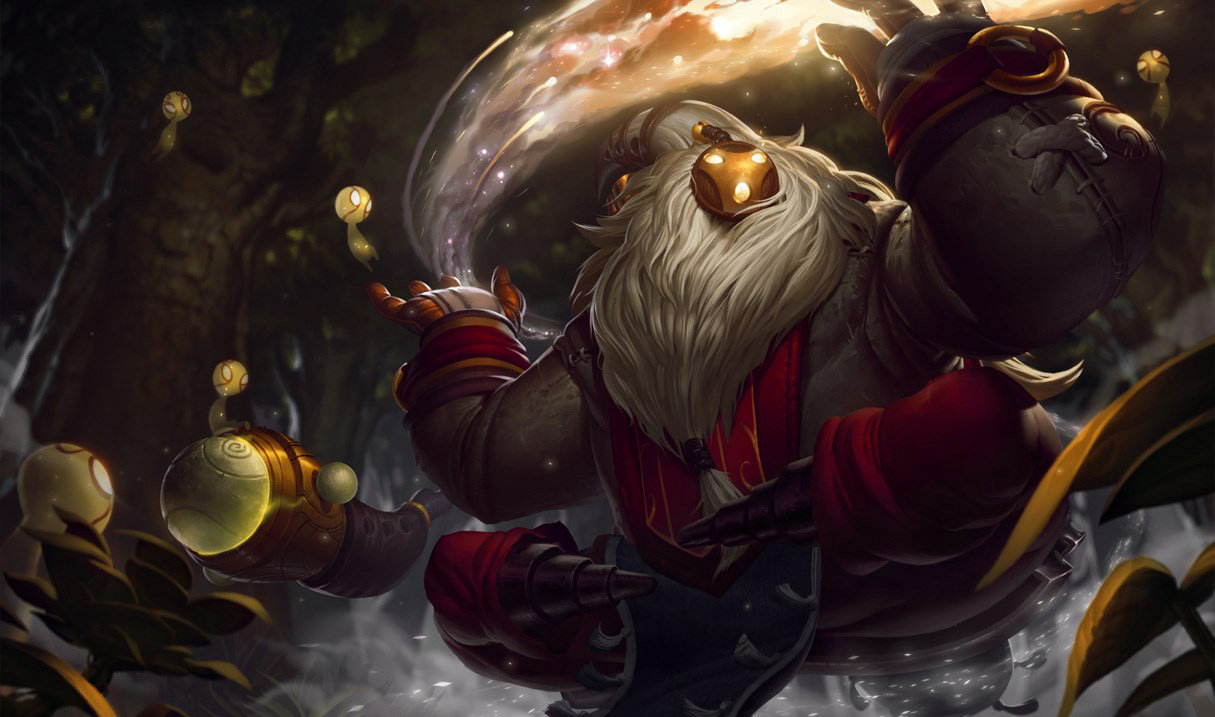
Bard is the most unique support in the game — a cosmic wanderer who grows stronger by roaming the map collecting ancient chimes. Unlike other supports, Bard's power is self-generated. The more chimes you collect, the more powerful your meep auto attacks become. Your R, Tempered Fate, is a game-changing ability that freezes the entire objective or enemy team for your team to capitalize on.
Abilities
Skills Overview
P

Traveler's Call
Passive
Meeps: Bard attracts lesser spirits that assist with his basic attacks to deal extra magic damage. When Bard has collected enough Chimes, his meeps will also deal damage in an area and slow enemies hit.Chimes: Ancient chimes randomly appear for Bard to collect. These grant experience, restore mana, and provide out of combat Move Speed.
Collect chimes constantly — every 10 chimes adds a meep to your auto attack that deals extra damage and eventually slows. Roaming to collect chimes is part of your win condition, not an optional luxury.
Q

Cosmic Binding
Skillshot · Stun · Pass-Through
Bard fires a missile which will slow the first enemy struck, and continue onward. If it strikes a wall, it will stun the initial target; if it strikes another enemy, it will stun them both.
CD: 11/10/9/8/7 · Cost: 60
Cosmic Binding stuns when it hits a minion or wall after passing through a champion, or hits two champions. Use it through minion waves to land free stuns in lane.
W

Caretaker's Shrine
Ground-placed · Heal Shrine
Reveals a Health shrine which powers up over a short time, disappearing after healing and speeding up the first ally that touches it.
CD: 0 · Cost: 70
Caretaker's Shrine heals more the longer it sits. Place shrines in the river or deep in your jungle — allies walking through during roams get healed passively.
E

Magical Journey
Terrain Creation · Portal
Bard opens a portal in nearby terrain. Allies and enemies alike can take a one-way trip through that terrain by moving into the portal.
CD: 22/20.5/19/17.5/16 · Cost: 30
Magical Journey tunnels can be used by allies AND enemies. Be strategic — never place a tunnel that shortcuts toward your backline. Great for escaping over walls.
R

Tempered Fate
Global · AoE · Stasis
Bard sends spirit energy arcing to a location, putting all champions, minions, monsters, and turrets hit into stasis for a brief time.
CD: 110/95/80 · Cost: 100
Tempered Fate puts everything it hits into stasis — allies included. NEVER ult your own team unless you're saving them from an execute. Always aim for enemies or objectives.
Skill Leveling Order — Max Q first, then W, then E · R at 6 / 11 / 16
| Level | Q | W | E | R | Note |
|---|---|---|---|---|---|
| 1 | Take Q — poke and stun from level 1 | ||||
| 2 | Take W — healing shrine for sustained lane presence | ||||
| 3 | Take E — tunnel for escape and roam utility | ||||
| 4 | Level Q — more damage and stun duration | ||||
| 5 | Level Q | ||||
| 6 | R — Tempered Fate unlocked, game-changing ult | ||||
| 7 | Level Q | ||||
| 8 | Level W — better heals on your shrines | ||||
| 9 | Q maxed ✓ | ||||
| 10 | Level W | ||||
| 11 | R rank 2 | ||||
| 12 | Level W | ||||
| 13 | Level W | ||||
| 14 | W maxed ✓ | ||||
| 15 | Start leveling E — faster tunnel travel | ||||
| 16 | R rank 3 | ||||
| 17 | Level E | ||||
| 18 | E maxed ✓ |
Itemization
Recommended Builds
Summoner Spells
Primary
Flash
Best repositioning tool — engage, escape and combo extension
Secondary
Exhaust
Reduce damage and slow to peel for your carries
Situational
 Ignite
Starter Items

Spellthief's Edge
Poke with Q and autos to stack charges rapidly. Your Q poke is strong enough to proc this reliably.
400g

Health Potion
Sustain during early lane phase before roaming becomes viable.
50g
Core Build

Shurelya's Battlesong
Active speed boost combos with your R stasis — enemies stop moving, you activate Shurelya's and your team charges in at full speed.
2500g

Mobility Boots
Essential for your roaming pattern. You need to collect chimes, set up mid picks, and be back in lane before the wave crashes.
1000g

Zeke's Convergence
Links to your ADC and slow-fields the enemies after your R stasis ends — perfect follow-up damage as they come out of stasis.
2600g

Redemption
Global healing is perfectly thematic with Bard's roaming. Drop it from anywhere during a fight you can't attend in person.
2300g
Situational

Mikael's Blessing
Cleanse for your ADC when facing heavy CC. Your R is not a reliable save tool — Mikael's actively cleanses them.
2300g

Locket of the Iron Solari
Shield for diving into objective fights. Great when you need to protect your team entering your own R stasis zone.
3190g

Warmog's Armor
Sustain that lets you roam further from lane without needing to recall. More time roaming means more chimes collected.
3000g
Build Shurelya's first as your primary engage tool after R. Zeke's adds sustained fight damage. Always prioritize Mobility Boots — your roaming is your identity.
AP Core

Luden's Tempest
Amplifies your Q poke and meep damage significantly. With enough chimes, Luden's Q bursts are extremely threatening.
3200g

Zhonya's Hourglass
Lets you self-stasis during your R to survive counter-engages. The active is essentially a personal Tempered Fate.
3250g

Rabadon's Deathcap
For truly fed Bard players who have collected 100+ chimes. Your meep autos become one-shots on squishies.
3600g
AP Bard is a high-risk build for players who have mastered chime collection. Only viable when significantly ahead or in lower-elo games where roaming goes unchallenged.
Runes
Inspiration Primary

Glacial Augment
Your Q slows after the stun expires — Glacial Augment adds a slow field that persists on the ground. Combined with your Q stun, enemies are locked down for an extended period.

Magical Footwear
Free boots at 12 minutes — saves 300 gold and lets you buy Shurelya's faster while keeping your Mobility Boots budget.

Biscuit Delivery
Mana sustain for early lane. Bard runs out of mana quickly when spamming Q and placing shrines.

Cosmic Insight
CDR on items and summoners. Your R has a long cooldown — getting it back faster is critical.
Sorcery Secondary

Manaflow Band
Mana sustain for a support that burns through mana quickly with Q spam and shrine placement.

Gathering Storm
AP scaling that powers up your Q and meep damage as the game goes long. Bard is a late-game powerhouse.
Shards
Ability Haste · Health · Health
Gameplay
How to Play Bard
01
Early Game
Poke, Collect Chimes, Don't Leave ADC Alone Too Long
- At level 1, focus on Q poke. Cosmic Binding through minions is a guaranteed stun whenever a second target is behind the first — abuse this constantly in lane.
- Your first chime spawn is at 1:40 — plan your lane path to collect nearby chimes during the lane phase without leaving your ADC too exposed.
- Place W shrines in the river brush when roaming. If your jungler needs a heal while fighting for Scuttle, your shrine can be the difference between life and death.
- Level 2 aggression with Q into Q stun is very strong. If both hit one target, the stun duration is doubled — a kill opportunity at level 2.
- Don't roam for more than 15-20 seconds without checking on your ADC. Solo lanes punish abandoned bot carries hard. Ping your ADC to play safe before you leave.
02
Mid Game
Roam Aggressively and Set Up Picks with R
- After level 6, your R enables incredibly powerful plays. Ult the Dragon when the enemy team is contesting and your team is behind — this blocks the objective steal.
- Use your E tunnel to give your jungler surprise access to the enemy jungle or to escape ganks. A tunnel over Dragon pit wall or Baron wall can change entire fight dynamics.
- Mid lane roaming: walk mid and drop a W shrine, then look for a Q stun on the enemy midlaner. If they're hit, your jungler should be tracking them for the kill.
- Collect all chimes in your half of the map between fights. A Bard with 100+ chimes deals significantly more burst damage per meep than a Bard with 30.
- Your R can ult your own team if they're about to die to an execute — a well-timed Tempered Fate on a low-HP teammate saves them from any finisher.
03
Late Game
Control Objectives with Tempered Fate
- Baron and Dragon setups: position opposite side of the pit and ult through the objective into the enemy team. This stalls their smite attempts while your team smites freely.
- In teamfights, try to R when enemies are clustered — 3+ target R is a massive swing. It deletes their DPS for 2.5 seconds which is usually enough for your team to kill them.
- Don't use R reactively — it should be planned. Count where enemies are, communicate with your team, then execute the ult at a specific moment rather than panic-pressing it.
- Redemption can be cast from across the map. If your team is fighting while you're collecting distant chimes, activate Redemption to assist from a distance.
- With enough chimes (150+), your meep auto attacks deal massive burst damage. You are no longer just a utility support — treat yourself as a secondary damage threat.
Teamfighting
How to Teamfight as Bard
Bard's teamfight toolkit is unusual — you don't engage directly, you control the battlefield. Your R freezes enemies, your Q stuns targets mid-chase, and your E portal repositions your team for angles the enemy never anticipated. Masterful Bard play looks effortless but requires precise pre-fight planning.
1
Pre-Fight — Plan the Ult
Before engage
01
Decide your R target before the fight starts. Will you ult the whole enemy team? Just their ADC? The objective? Plan it, communicate it, then execute.
02
Place W shrines in the fight area 30 seconds before the fight starts. Healing shrines don't despawn quickly — they'll be there when your team needs them.
03
Open an E tunnel for your team to use as a flank route or escape. A tunnel over a wall gives your team an engage angle the enemy isn't watching.
NEVER ult your own team unless you're specifically saving them from an execute. Putting your team into stasis during a fight often means you lose the fight.
2
Fight — Execute the Stasis
Fight opening
01
Q the primary target as your team engages. The stun window lets your team build up abilities without the target escaping.
02
R when enemies cluster — 3+ enemies in stasis is worth it every time. They can't damage your team, use abilities, or escape for 2.5 seconds.
03
Activate Shurelya's the moment your R stasis ends — your team rushes in at full speed onto helpless targets emerging from the freeze.
3
Aftermath — Peel and Reposition
Mid-fight
01
Q any enemy diving your carry after the initial burst. Your Q stun gives your ADC time to auto-attack back to safety.
02
Open an E tunnel for escapes if the fight goes badly. A tunnel over the pit wall is an instant out for your entire team.
03
Drop Redemption on allies who are taking heavy burst damage. The heal zone can save multiple people at once.
Bard's R can hit the Dragon or Baron themselves — ult the objective when the enemy is about to smite-steal it. They cannot smite while in stasis.
Video Guide
Watch the Full Guide

Credits to i0ki
Tips & Tricks
Advanced Mechanics & Hidden Tech
Advanced mechanics for Bard.
Basic
Q Through Minions for Free Stuns
Cosmic Binding stuns if it hits a champion and then a minion/wall behind them. Stand at the edge of your range and fire Q through the minion wave at the enemy — the minion behind them ensures a stun.
Basic
Collect Chimes Every Trip
Every time you roam, collect chimes on your path. They spawn every 50 seconds across the map. Your strength as Bard scales directly with how many you've collected — never ignore them.
Intermediate
Shrine Placement Timing
W shrines take time to fully charge their healing power. Place them in the river or brushes BEFORE a fight is expected, not during. A pre-placed shrine heals for 3x more than one dropped in the chaos.
Intermediate
E Tunnel for Objective Pressure
Place tunnels over Dragon pit and Baron walls. This gives your team a stealth approach angle that the enemy can't anticipate, and lets your team escape if the fight goes badly.
Advanced
R the Objective, Not Just Champions
Tempered Fate hits objectives — Dragons, Baron Nashor, and the Rift Herald. When the enemy is about to steal Dragon with smite, ult it. They cannot smite while it's in stasis and your team smites for free after.
Basic
Never Ult Your Own Team in a Fight
Putting your team into stasis during a fight pauses their damage output. Only ult allies to save them from an execute (Zed R, Karthus R, Pyke R) — never in a normal fight.
Intermediate
Roam Timing with Wave State
Roam when the bot wave is crashing into the enemy tower. This gives you maximum time to collect chimes or make a mid play before the wave bounces back and your ADC needs you.
Advanced
Meep Auto Between Abilities
Each meep empowered auto resets your chase stack. Weave autos between Q casts to maximize meep pops — high chime count Bard deals more damage with auto resets than most supports.
Matchups
Counters & Matchups
Bard struggles against aggressive engage supports who punish his roaming windows and champions who can lock him down before he can execute his ult. He excels against passive, immobile enchanters.
Click any matchup to expand tips & how to play against them
Loses Against

Leona's aggressive, all-in style punishes Bard's roaming — your ADC is left alone against one of the most lethal kill supports. Leona's CC chain also interrupts your Q setup easily.
Warn your ADC before every roam. Leona wins the 2v1 if she gets to engage. Only roam when the wave is fully crashed under their tower.

Blitzcrank can hook you or your ADC from outside your Q range. His hook punishes the minion-walking pattern you use to generate Q stuns, as your attention is focused on setup.
Stay behind the minion wave. Blit's hook range is limited to straight lines — using minions as a buffer is your primary defense.

Morgana's Black Shield blocks your Q stun — your primary CC tool is negated instantly. She can also root you from very long range before you can set up any play.
Wait for Black Shield to expire before throwing Q. Focus your stuns on the ADC, not Morgana herself.
Wins Against

Soraka has no way to prevent your engage or escape your Q. She's also very stationary — perfect for predicting your Q through minion angles. Her silence (E) has short range and comes too late.
Q Soraka first every time. She cannot heal if she's stunned, and your passive poke from meeps whittles her down constantly.

Sona has very low mobility and your Q poke is difficult for her to dodge. She wants to stand behind minions and poke, but your Q passes through minions specifically to hit her.
Use Q through waves to hit Sona reliably. She has to play at max range or risk constant stuns.

Lux wants to poke from long range but your Q has comparable range and your E tunnel lets you flank her from unexpected angles. She's also squishy and falls easily to a Q into meep combo.
Use E tunnel to flank Lux from a blind angle. She can't dodge what she can't see coming.

Yuumi relies on being attached to a host. Your R on the host puts both of them into stasis — Yuumi cannot leave stasis before the host, so they share the freeze.
R the host champion to freeze both Yuumi and her host simultaneously. Your team can burst the host while they're frozen.
Team Comp
Best Synergies

Bard R stasis freezes grouped enemies, setting up Yasuo's Last Breath R on the entire stasised team — one of the most iconic wombo combos; enemies cannot react while frozen.

Bard R stasis groups enemies while MF pre-aims Bullet Time; the moment stasis ends, Bullet Time fires into the helpless cluster for full-duration uninterrupted damage.

Jinx's lack of mobility is offset by Bard's tunnels giving repositioning options and chime-sustained shields; Bard R stasis lets Jinx Super Mega Death Rocket from full safety.

Both roam-heavy champions coordinate mid-lane picks; Bard Q stun locks targets for Nidalee's pounce-into-burst follow-up, and both players contribute chime-like map pressure.