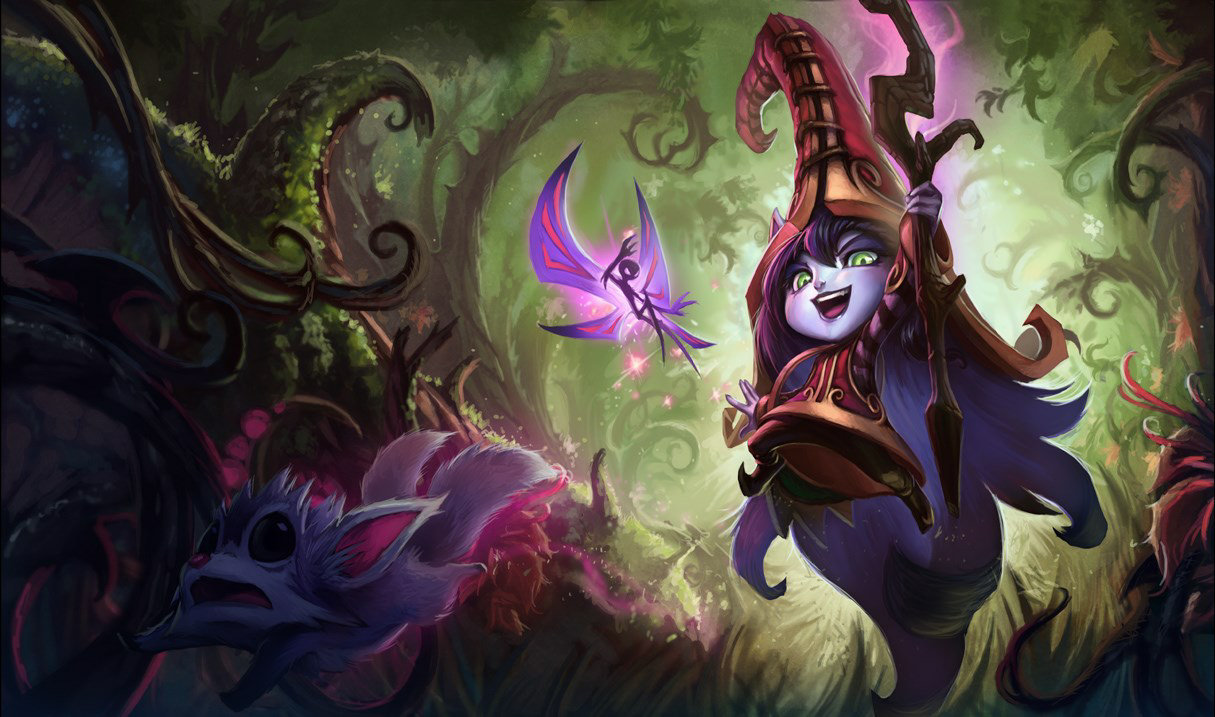
Lulu is the ultimate hypercarry enabler. Your job is to keep your carry alive through any situation — a diving assassin gets polymorphed, a burst mage's combo is absorbed by your E shield, and Wild Growth buys your carry 3+ seconds of free damage even when they're at death's door. The better your carry plays, the better Lulu performs.
Abilities
Skills Overview
P

Pix, Faerie Companion
Passive
Pix fires magical bolts of energy whenever the champion he's following attacks another enemy unit. These bolts are homing, but can be intercepted by other units.
Pix fires bolts at your auto-attack target. Use Pix to harass in lane — it fires 3 bolts that deal magic damage on top of your auto. Help, Pix! (E) also sends Pix to allies to grant vision or to enemies to give them false vision.
Q

Glitterlance
Dual-Beam · Slow
Pix and Lulu each fire a bolt of magical energy that damages and heavily slows all enemies it hits.
CD: 7 · Cost: 50/55/60/65/70
Glitterlance fires in two directions from your position and Pix's position. When Pix is on an ally, both beams fire from different locations — creating a 2-direction slow that's very difficult to dodge. Position so both beams can hit the same target.
W

Whimsy
Single-Target · Polymorph or Haste
If cast on an ally, grants them Attack Speed and Move Speed for a short time. If cast on an enemy, turns them into an adorable critter that can't attack or cast spells.
CD: 18 · Cost: 65
Whimsy on enemies polymorphs them (disables abilities). Whimsy on allies gives them movement speed and attack speed. Always polymorph the highest-threat enemy who's attacking your carry — and haste your carry.
E

Help, Pix!
Shield · Ally or Enemy Vision
If cast on an ally, commands Pix to jump to an ally and shield them. He then follows them and aids their attacks. If cast on an enemy, commands Pix to jump to an enemy and damage them. He then follows them and grants you vision of that enemy.
CD: 10/9.5/9/8.5/8 · Cost: 60/65/70/75/80
Help, Pix! on allies shields them AND sends Pix to that ally for dual-source Q beams. On enemies, it places Pix on them for vision and Q beam alignment. Always E your carry in fights.
R

Wild Growth
Ally-Targeted · Knockup AoE · HP Bonus
Lulu enlarges an ally, knocking nearby enemies into the air and granting the ally a large amount of bonus health. For the next few seconds, that ally gains an aura that slows nearby enemies.
CD: 120/100/80 · Cost: 100
Wild Growth is cast on an ally — it instantly grows their size, knocks up all nearby enemies, and gives them bonus max HP. Save R specifically for when a high-value carry is about to die. Pre-R positioning: be near your carry at all times.
Skill Leveling Order — Max E first, then Q, then W · R at 6 / 11 / 16
| Level | Q | W | E | R | Note |
|---|---|---|---|---|---|
| 1 | Take E — shield your carry from level 1 | ||||
| 2 | Take Q — poke and slow threat available | ||||
| 3 | Take W — polymorph or haste available, full kit online | ||||
| 4 | Level E — bigger shield | ||||
| 5 | Level E | ||||
| 6 | R — Wild Growth carry save unlocked | ||||
| 7 | Level E | ||||
| 8 | Level Q — lower CD and more slow | ||||
| 9 | E maxed ✓ | ||||
| 10 | Level Q | ||||
| 11 | R rank 2 | ||||
| 12 | Level Q | ||||
| 13 | Level Q | ||||
| 14 | Q maxed ✓ | ||||
| 15 | Start leveling W — polymorph duration and haste amount | ||||
| 16 | R rank 3 | ||||
| 17 | Level W | ||||
| 18 | W maxed ✓ |
Itemization
Recommended Builds
Summoner Spells
Primary
Flash
Best repositioning tool — engage, escape and combo extension
Secondary
Exhaust
Reduce damage and slow to peel for your carries
Situational
 Ignite
Starter Items

Spellthief's Edge
Your Q, E, and W generate Spellthief stacks extremely fast. Lulu's poke pattern is perfect for Spellthief stacking.
400g

Health Potion
Sustain for aggressive lane trades.
50g
Core Build

Moonstone Renewer
Heals on every ability cast in combat. Your Q, E, and W all proc Moonstone in fights — constant healing that sustains your carry and yourself.
2500g

Ionian Boots of Lucidity
Ability haste for more E shields and W polymorphs per fight. Lower R cooldown means more Wild Growth saves per game.
950g

Staff of Flowing Water
Ability haste buff to your shielded carry. E onto your ADC gives them bonus haste — excellent for Ezreal, Lucian, or any carry who uses abilities.
2300g

Ardent Censer
Attack speed on-hit damage for shielded allies. Shield your carry and they instantly gain attack speed — crucial for auto-attack hypercarries like Kog'Maw or Jinx.
2300g
Situational

Redemption
Global healing for teamfights. Cast from across the map if you can't attend.
2300g

Mikael's Blessing
Cleanse for your carry when facing Leona, Blitzcrank, or Nautilus. Your polymorph (W) helps but Mikael's provides an additional hard cleanse.
2300g

Shurelya's Battlesong
Speed boost for disengage or chase. Pairs with W haste on your carry for a massive speed burst during kiting.
2500g
Moonstone first for sustained fight healing. Staff + Ardent are your damage amplifiers for your carry. This three-item core is the standard protect-the-hypercarry setup — your carry deals 20-30% more damage while shielded.
Utility Core
Moonstone Renewer
Primary healing through ability spam.
2500g
Redemption
Global heal — cast during every major teamfight for huge healing bombs.
2300g
Mikael's Blessing
Hard cleanse for CC-heavy matchups.
2300g
Full utility build for maximum healing and CC protection against comp-wide heavy engage.
Runes
Sorcery Primary

Summon Aery
Procs on every E shield, Q hit, and W cast. Adds a shield to allies and damage to enemies with nearly every ability. Lulu is the perfect Aery champion with her high cast frequency.

Manaflow Band
Mana sustain for constant E shielding. Lulu uses E frequently which creates mana pressure early — Manaflow solves it.

Transcendence
Ability haste for more R saves, W polymorphs, and E shields per game. Every point of ability haste directly increases your protection output.

Gathering Storm
AP scaling improves your E shield value and R HP bonus in the late game. Late Lulu shields are significantly larger than early ones.
Resolve Secondary

Font of Life
Your Q slow marks enemies for ally healing. Additional passive healing source during fights.

Conditioning
Free resistances at 12 minutes for survivability in a squishy role.
Shards
Ability Haste · Ability Haste · Health
Gameplay
How to Play Lulu
01
Early Game
Poke with Q, Shield Every Trade
- Level 1 E: shield your ADC immediately before any trade. The Aery proc adds a small additional shield on every cast — E as frequently as possible for max Aery uptime.
- Q poke is your primary harass tool. Fire the dual-beam through the minion wave to hit enemies hiding behind it — both beams slow independently, making it a difficult slow to escape.
- W polymorph on all-in attempts: if the enemy support engages, immediately polymorph them before they can cast their CC. Turning Leona into a critter for 1.5 seconds cancels her entire engage sequence.
- E your ADC before they auto attack in trades — the Ardent Censer attack speed buff (once you have the item) gives them bonus attack speed and on-hit damage. Time E to enhance their damage output.
- In all-in situations, the combo is: E shield your ADC, W polymorph the enemy support, Q slow the enemy ADC, and if they're going to die, R your ADC. This 4-ability sequence in 2 seconds neutralizes most all-ins.
02
Mid Game
Follow Your Carry Everywhere
- Never leave your hypercarry alone after mid-game. Your R is on a 110-second cooldown — if your carry dies while you were roaming, you've wasted your entire purpose.
- In skirmishes, W the highest-threat enemy who is attacking your carry. Polymorph prevents any abilities for 1.5 seconds — use it on Zed who Q'd onto your carry, Katarina who's casting R, or any assassin mid-burst.
- Before Dragon fights, Q poke enemies repeatedly. Your dual-beam slow forces enemies to play carefully — use this to control the pit entrance and force the enemy team back.
- Use E on enemies to place Pix on them — this gives you vision of them and changes your Q beam angles. E the enemy carry to track their position through walls.
- Stay glued to your primary carry target at all times. Position directly behind or beside them — you need to be in R range (650 units) at any moment.
03
Late Game
Make Your Hypercarry Unkillable
- Wild Growth timing is the most important skill in Lulu's kit. R at 15-20% HP gives your carry the maximum HP buffer — too early and it's wasted if they weren't in danger; too late and they die before it lands.
- Polymorph the assassin who dives your carry IMMEDIATELY upon their arrival. A Zed, Talon, or Katarina who gets polymorphed mid-burst has wasted their entire combo.
- In teamfights, position between your carry and the direction of incoming threats. Your E blocks the first burst while R saves them from the second burst — two layers of protection.
- Ardent Censer + Staff of Flowing Water + Moonstone creates a period during fights where your carry deals 25% more damage, heals from every ability, and has both attack speed and haste buffs. This window decides fights.
- R can be used proactively on your carry when they're diving in — the knockup on nearby enemies clears a path for them to deal damage unimpeded. Don't always save R for emergencies.
Teamfighting
How to Teamfight as Lulu
Lulu teamfights by creating a bubble of invincibility around one carry. Your Wild Growth, Whimsy polymorph, E shield, and Q slow all work together to ensure your primary carry deals maximum damage for maximum time. A Lulu who uses all 4 abilities optimally in one teamfight can make the fight feel completely unwinnable for the enemy.
1
Pre-Fight — Attach to Your Carry
Before engage
01
Stay within 650 units of your carry at all times — this is R range. If you're ever further away, reposition immediately.
02
E shield your carry as the fight approaches. Aery proc adds another micro-shield on top.
03
Identify the primary threat — who is most likely to kill your carry? That's your W polymorph target.
Never use W on a tank when you should be saving it for the assassin. Polymorphing a Malphite wastes your carry-save tool — always save W for the highest-threat diver.
2
Fight — Peel Every Threat
Fight opening
01
W polymorph the first assassin who dives your carry. 1.5 seconds of disable cancels an entire burst combo.
02
E shield your carry immediately after W — the double-cast (W + E) in quick succession is your bread-and-butter peel rotation.
03
Q slow any chasing enemy — both beams slow independently. A slowed chaser cannot reach your kiting carry.
04
R your carry at 15-20% HP for the HP buffer and AoE knockup on surrounding divers.
3
Aftermath — W Haste on Carry for Chase
Mid-fight
01
W your carry after the polymorph CD expires — the haste buff helps them chase fleeing enemies or kite backward if the fight turns.
02
E enemies for Pix vision during chases — track them through walls and line up Q hits.
03
Moonstone healing activates on every cast — constant E, Q, and W cycling provides significant fight-long healing to your carry.
Wild Growth's knockup is instantaneous and AoE. If your carry dives into the enemy team and enemies surround them, R at that moment — the knockup hits all 5 enemies and gives your carry 3+ seconds of free damage.
Video Guide
Watch the Full Guide

Credits to Coach K
Tips & Tricks
Advanced Mechanics & Hidden Tech
Advanced mechanics for Lulu.
Basic
R at 15-20% HP
Wild Growth timing is everything. R at 15-20% HP gives maximum HP buffer effect. Too early and you waste it; too late and they die before it activates. Watch your carry's HP bar constantly and have R ready from the moment they drop below 30%.
Basic
W Polymorph the Diver, Not the Tank
Whimsy polymorph is wasted on tanks who don't have abilities. Always save W for the assassin or mage diving your carry — Zed, Katarina, LeBlanc. A polymorphed Zed cannot activate death mark, a polymorphed Katarina cannot cast R.
Intermediate
Dual Q Beam from Pix
After using E on an ally, Q fires from both your position AND Pix's position on that ally. This creates two separate beams that are nearly impossible to dodge simultaneously. Position so both beams converge on the same target.
Intermediate
E Enemies for Vision Tracking
Help, Pix! cast on enemies places Pix on them — granting vision of their location through walls and brush. Use E on enemies who are escaping through brushes to track them and line up your Q follow-up.
Advanced
R as Engage Tool
Wild Growth can be used proactively when your carry is diving into the enemy team. The AoE knockup clears space around your carry, interrupting abilities and creating a safe burst zone. You don't always have to save R for saves.
Basic
Ardent Censer Timing
Ardent Censer's attack speed buff activates when you shield your ally. Time your E to land right before your carry starts auto-attacking their primary target — the buff is most valuable during their maximum DPS window.
Intermediate
Q Slow Kiting Setup
When your carry is kiting backward, Q the nearest chasing enemy. The slow prevents them from closing the distance while your carry auto attacks. Follow up with W haste on your carry for additional kiting speed.
Advanced
Pix on Enemy ADC for Q Beam
E the enemy ADC to place Pix on them. Now when you Q, one beam fires from Pix's position on the enemy carry — meaning the beam fires from INSIDE their position. This beam is impossible to dodge and deals full damage.
Matchups
Counters & Matchups
Lulu is hard-countered by engage supports who can CC her before she can polymorph or shield, and burst assassins who can kill her carry faster than her abilities can react. She destroys immobile enchanters in sustained fights.
Click any matchup to expand tips & how to play against them
Loses Against

Blitzcrank hooks Lulu herself before she can react with W. His E knockup interrupts her ability casts and his silence prevents W polymorph or R saves after the hook.
Stay behind your ADC at all times. If Blitz hooks you, immediately R yourself (you can self-cast R for the knockup on surrounding enemies) to buy time.

Leona's E+Q CC chain happens faster than your W polymorph reaction time. Multiple stuns prevent your R casting and your E shield alone cannot absorb the all-in.
W Leona the moment she starts E animation — polymorph during the dash. If timed correctly, she arrives as a critter and the combo fails.

Nautilus hooks from extremely long range and his ult tracks your carry regardless of positioning. Your kit is reactive — his ult creates a tracking missile you cannot outpace.
W polymorph Nautilus when he hooks. The polymorph prevents his follow-up E and Q chain while your ADC escapes the pull.
Wins Against

Soraka's healing output is outpaced by your Moonstone + ability spam healing. Your Q slows prevent her from safely positioning for heals, and you can poke her with Q + Comet damage.
Aggressive Q poke keeps Soraka from safely healing. Force her to choose between positioning for heals or avoiding your damage.

Yuumi cannot protect her host from your polymorph or your ADC's shielded burst. Your ability to both damage and protect outclasses Yuumi's attached healing in shorter fights.
Focus the host. Yuumi attached to a host takes reduced value when the host is polymorphed or slowed.

Sona's aura-range play pattern is countered by your Q range advantage. She can't heal or shield from outside your Q slow range safely.
Q poke constantly. Sona wants to stand at her aura range — your Q exceeds that range, forcing her to either take damage or fall too far back.
Nami's CC chain (Aqua Prison bubble) is easily dodged with your W haste. Your E shield outvalues her Ebb and Flow in direct trades.
W your ADC when Nami winds up Aqua Prison — the haste boost lets them sidestep the bubble while you Q slow her.
Team Comp
Best Synergies
Lulu's Wild Growth R makes Kog'Maw unkillable during his hyper-carry phase, and her E attack-range extension lets him hit targets from an even safer distance. W polymorph blocks any diver before they can reach Kog'Maw.

Lulu's W polymorph turns assassins into squirrels before they can burst Jinx, and Wild Growth keeps Jinx alive long enough to start chaining resets. Jinx's late-game hypercarry damage is protected by Lulu's entire kit.

Lulu's E shield and Wild Growth R give Yasuo enough bulk to dive into enemies recklessly. Her W can polymorph threats targeting Yasuo and her Q slow sets up his tornado engage from unexpected angles.

Lulu's W polymorph, Q slow, and Wild Growth R create a protective bubble around Vayne, letting her kite safely. The attack speed from Lulu's passive and E amplify Vayne's Silver Bolts true damage output.