
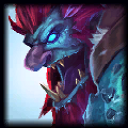
Briar is a berserker jungler — once you press W, you commit fully. She has no disengage, no peel, and no retreat. Every decision is binary: all in or don't fight. Mastering Briar means knowing WHEN to press W, not how.
Abilities
Skills Overview
P

Crimson Curse
Passive
Briar's attacks and abilities apply a stacking bleed that heals her for a portion of the damage it deals. Perpetually hungry, she gains increased healing based on her missing Health, but lacks innate Health Regeneration.
Briar heals from all damage while bleeding — build damage to maximize healing. She cannot heal from normal sources.
Q

Head Rush
Dash · Heal · Stun
Briar leaps to a unit and hits enemies with The Heel Wheel (of Pain), stunning them and breaking their Armor.
CD: 13/12/11/10/9 · Cost: 0
Q has two casts: first is a dash that stuns, second is a bite that heals. Always use both parts.
W

Blood Frenzy / Snack Attack
Self-Taunt · Attack Speed · Lifesteal
Briar leaps forward and shatters her pillory, entering a Blood Frenzy that causes her to relentlessly pursue the nearest enemy (prioritizing champions). While frenzied, she gains increased Attack Speed and Move Speed, and her attacks deal damage in an area around her target.Briar can reactivate this ability while frenzied to take a CHOMP out of her target on her next attack, dealing additional damage based on their missing Health, and healing Briar based on the damage she deals.
CD: 14/13/12/11/10 · Cost: 0
W self-taunts you to attack the nearest enemy. You CANNOT stop attacking. Only press W when you're committed.
E

Chilling Scream
Channel · AoE · Armor Shred
Briar refocuses her mind, removing Blood Frenzy and channeling energy into a powerful scream that damages and slows enemies. While charging, she takes reduced damage and heals for a portion of her max Health. A fully charged scream knocks foes back, dealing additional damage and stunning those who collide with a wall.
CD: 16 · Cost: 0
E charges up and releases a scream that fears + shreds armor. Use it while W is active for max effect.
R

Certain Death
Global · Dash · Fear
Briar kicks her pillory's hemolith gemstone, marking the first champion it hits as her prey. She then beelines straight to them, fearing other surrounding enemies upon arriving at her target, and enters a state of complete hemomania. She will pursue her prey until death, gaining the benefits of Blood Frenzy as well as additional Armor, Magic Resistance, Life Steal, and Move Speed.
CD: 120/100/80 · Cost: 0
R is global — use it to fly across the map for picks. The fear on arrival sets up your full combo.
Skill Leveling Order — Max W first, then Q, then E · R at 6 / 11 / 16
| Level | Q | W | E | R | Note |
|---|---|---|---|---|---|
| 1 | Take W — your main clear and fighting tool | ||||
| 2 | Take Q — dash + stun + heal | ||||
| 3 | Take E — AoE fear + armor shred | ||||
| 4 | Level W | ||||
| 5 | Level W | ||||
| 6 | R — global engage unlocked | ||||
| 7 | Level W | ||||
| 8 | Level Q | ||||
| 9 | W maxed ✓ | ||||
| 10 | Level Q | ||||
| 11 | R rank 2 | ||||
| 12 | Level Q | ||||
| 13 | Level Q | ||||
| 14 | Q maxed ✓ | ||||
| 15 | Start leveling E | ||||
| 16 | R rank 3 | ||||
| 17 | Level E | ||||
| 18 | E maxed ✓ |
Itemization
Recommended Builds
Summoner Spells
Primary
Flash
Best repositioning tool — engage, escape and combo extension
Secondary
Smite
Required for jungling — secures Dragon, Baron and camps
Situational
 Ghost
Ghost
Starter Items

Gustwalker Smite
Movement speed after camps — helps reach ganks faster.
450g

Long Sword
Early AD for clear and dueling.
350g

Refillable Potion
Sustain through early clear.
150g
Core Build

Eclipse
Omnivamp + shield on proc. Synergizes perfectly with your all-in playstyle.
2800g

Berserker's Greaves
Attack speed compounds with W for massive DPS.
1100g

Black Cleaver
Armor shred stacks with E. HP keeps you alive during W frenzy.
3100g

Sterak's Gage
Shield when low HP — buys time for W lifesteal to heal you back up.
3100g
Situational

Maw of Malmortius
Magic damage shield. Never build with Sterak's — they share a unique passive.
2800g

Death's Dance
Bleed passive + heal on kill. Perfect for extended fights.
3300g

Guardian Angel
Second life after your all-in. Great when you're the win condition.
3200g
Eclipse → Berserker's → Black Cleaver is your core. After that, build defensive to survive your own W.
Runes
Precision Primary

Conqueror
Stacks fast with W attack speed. Healing at max stacks supplements your passive.

Triumph
Heal on takedown — critical since you can't disengage from W.

Legend: Alacrity
More attack speed means more W healing.

Last Stand
Bonus damage when low — you're always low in W fights.
Resolve Secondary

Bone Plating
Blocks burst damage during your W all-in.

Unflinching
Tenacity when low HP — CC during W is your biggest weakness.
Shards
Attack Speed · Adaptive Force · Health
Gameplay
How to Play Briar
01
Early Game
Healthy Clear, Aggressive Ganks
- Start Red → Raptors → Wolves → Blue → Gromp. W makes your clear healthy — you lifesteal through camps.
- Level 3 ganks are strong. Q dash + W all-in is hard to survive if the lane is pushed.
- You win most 1v1s early because of W lifesteal. Invade weak early junglers like Karthus or Amumu.
- Avoid ganking lanes with heavy CC — getting stunned during W means you die.
- Ward enemy jungle entrances to track their pathing and find invade opportunities.
02
Mid Game
Snowball Kills Into Objectives
- Eclipse spike (~10 min) makes your all-ins almost impossible to out-trade. Force fights.
- Use R to gank from across the map. The fear on arrival guarantees your combo lands.
- In 2v2 skirmishes, press W and focus the squishier target. Kill them fast, then turn on the second.
- Dragon fights favor you — W in the pit with your team behind you means enemies can't kite you.
- Don't use W to engage 5v5s. Use R to pick someone off, THEN W for the cleanup.
03
Late Game
Global R Picks Win Games
- Your R is a pick tool, not an engage tool. Find an isolated enemy, R them, kill them, then 5v4.
- In teamfights, wait for enemy CC to be used, THEN W in. Getting CCed during W is instant death.
- E fear can disrupt entire teamfights if positioned well. Charge it in W, release when grouped.
- Flank from the side. You're not a frontliner — you're a cleanup diver.
- If you're behind, use R defensively to catch enemies who are chasing your team.
Teamfighting
How to Teamfight as Briar
Briar's teamfighting is high-risk, high-reward. She cannot retreat once W is active, so timing is everything.
1
Pre-Fight — Wait for CC
Before engage
01
Track enemy CC cooldowns. If Leona R, Lux Q, etc. are up, do NOT press W.
02
Position on a flank. Don't stand with your team — you need a side angle to reach the backline.
03
Use R to start the fight if you can catch an isolated target.
Pressing W into 3+ enemies with CC up is suicide. Wait for your team to bait abilities first.
2
Engage — Q + W All-In
Fight opening
01
Q onto your target first for the stun, then immediately W.
02
Auto-attack rapidly — you can't control who you hit during W, so make sure you're closest to the right target.
03
Charge E during W for the armor shred + fear combo.
3
Cleanup — Ride the Lifesteal
Mid-fight
01
Each kill heals you. Triumph + passive healing means you get healthier as the fight goes on.
02
Don't panic when low. Your passive healing kicks in harder at low HP. Trust the sustain.
03
If W ends, reposition before pressing it again. You get a brief window to choose your next target.
W self-taunt means you attack the nearest enemy. Position yourself so the nearest enemy is the carry, not the tank.
Video Guide
Watch the Full Guide

Credits to L0ganJG
Tips & Tricks
Advanced Mechanics & Hidden Tech
Advanced mechanics for Briar.
Basic
W Commitment
Once W is active, you CANNOT stop attacking. Only press W when you're sure you want to fight. There is no cancel.
Intermediate
Q Double Cast
Q has two parts: a dash (first cast) and a bite (second cast). The bite heals — always use both parts for max sustain.
Advanced
E Flash
You can charge E and then Flash to reposition the fear cone. This catches enemies who think they're safe.
Basic
R Scouting
R reveals enemies in the landing zone. Use it to check objectives or bushes safely from across the map.
Intermediate
Target Selection in W
W attacks the nearest enemy. Before pressing W, walk close to your intended target so you don't accidentally attack the tank.
Advanced
W Resets
When W ends, you have a brief moment of clarity. Use this window to assess the fight and decide whether to re-engage with a second W.
Basic
Clear Health
W lifesteal makes your jungle clear extremely healthy. You should rarely need to recall before your first item component.
Matchups
Counters & Matchups
Briar struggles against champions with reliable CC that can lock her down during W. She excels against immobile targets she can run down.
Click any matchup to expand tips & how to play against them
Loses Against

Rammus taunts you during W — you're already self-taunted, so you're just standing still dying. His thornmail reflect destroys your auto-attack DPS.
Never fight Rammus. Focus the opposite side of the map. You cannot win this 1v1 at any stage.

Udyr's stun interrupts your W, and his sustained damage + tankiness outlasts your all-in. He clears faster and invades you easily.
Avoid 1v1. Outgank him — your R is global, his is not. Win through map plays, not fights.
Trundle's pillar blocks your Q dash path and his R steals your stats during W. He out-sustains you in extended trades.
Don't fight in his W zone. Disengage... except you can't. Just avoid him entirely.
Wins Against

Karthus can't escape your W all-in. Zero mobility, zero peel. You run him down every time.
Invade him at level 3. He dies to Q + W combo. Repeat every time your camps are cleared.

Evelynn is squishy and can't fight you in W. Your Q reveals her stealth direction and she can't charm you fast enough.
Invade her camps pre-6. She has no dueling power against your sustain.

Nidalee's poke is irrelevant — you lifesteal it back in W. She can't kite you with Q dash closing the gap.
Q onto her, W, and auto her down. She melts in 3 seconds.
Team Comp
Best Synergies

Lulu's ult and shield keep Briar alive during W self-taunt when she cannot disengage; Whimsy polymorph on enemy assassins targeting Briar saves her when W is active.
Malphite R groups the entire enemy team, allowing Briar to safely W all-in the clustered backline; the knockup CC means enemies cannot respond to Briar's self-taunted aggression.

Janna's tornado and R disengage protect Briar after she dives deep into enemy lines; when W ends and Briar needs to escape, Janna's disengage tools create the exit she cannot make herself.

Lux binding root locks down targets for Briar R landing fear into full Q+W all-in; Lux's root from a safe distance sets up Briar's gap close without wasting W commitment.